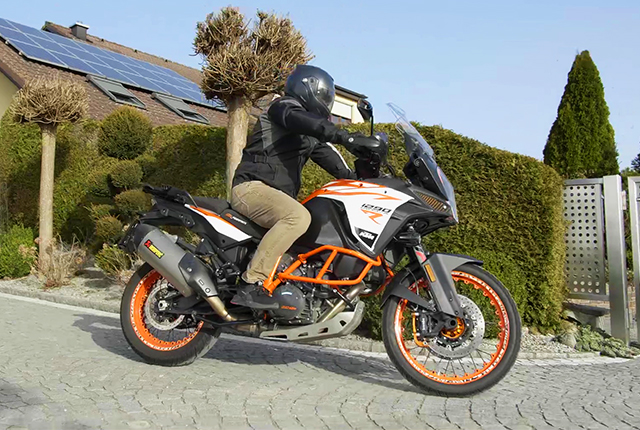
HOW-TO: DEWINTERISE A MOTORBIKE

AND CHANGE THE BATTERY

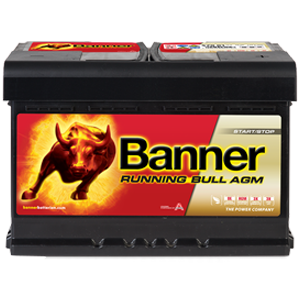
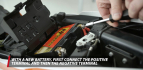
If the battery in your motorbike has been checked and the test result is „defective“, then a replacement will be urgently required.

We show you how to do it step by step. The Banner battery experts have prepared important tips especially for you.

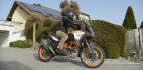
All information applies to the entire two-wheeler sector, i.e. motorbikes and the increasingly strong market segments of mopeds, scooters and motor scooters - please do not forget the small 50cc models.

Banner HOW-TO: Dewinterising the motorbike and changing the battery

Dewinterising the motorbike and changing the battery

  • (1)  Locating your battery

    • Usually the battery is hidden somewhere under the seat or the fairing. In many cases, the battery will be in a plastic compartment or inside padded thermal protection. This information can often be found in the vehicle’s manual. However, this does not affect the process for changing the battery.
    • Keyword “position-independent installation”. Please note the following information. When installing in a lateral or inclined position, you absolutely need a tilt- and leak-proof battery from the Bike Bull GEL or AGM PRO series. Do not use Bike Bull (Classic) or Bike Bull AGM batteries in this installation situation. We try to take this into account in the battery allocations on an ongoing basis.
  • (2) Checking the battery with a testing device

    • Please note the information in the online article. HOW-TO: TESTING A BATTERY and of course, always read the operating instructions for the testing device. The information provided there is intended to serve as a rough guide for using all Banner test devices.
    • We recommend the Banner Battery Tester BBT DBA for periodic battery checks (voltage/cold start).
    • Please make sure to recharge the battery as soon as an open-circuit voltage limit of 12.5 V has been reached. To be able to measure the off-load voltage, you should wait approx. 5 hours after you have finished charging the battery (internally by alternator, externally by charger), or it has not been discharged for at least 1 hour.


    Banner tip: If the battery is charged when installed and not disconnected, never switch on the ignition. In the worst case, there is a risk of damage to control units.

  • (3) Removing the battery

    • It is essential to observe the warning information on the battery and in the vehicle’s manual.
    • After you have found out how the battery is mounted, you can start with removing it. 
    • Before removing the battery, switch off the engine and all power consumers. Remove the ignition key; do not leave it in the ignition switch. Avoid short circuits caused by tools.
    • Change the battery in the vehicle. When removing the battery, first disconnect the negative terminal (-), then the positive terminal (+).
  • (4) Isolate the positive terminal (+) of the old battery.

    • Please note: always secure the positive terminal (+) of the old battery against short-circuiting before transferring it to a used battery container. Attach the red terminal cap or insulate with adhesive tape (Powertape).
    • You, as the consumer, can then return the old motorbike battery free of charge to any Banner sales partner, regardless of the brand. In this way, we can guarantee environmentally friendly recycling.
  • (5) Finding the right battery online

    • Find the right Banner battery using the battery search – for motorbikes, mopeds, scooters, ATV quads, jet skis, lawn tractors, UTV utility vehicles and snowmobiles.
    • Wherever possible with an upgrading recommendation for higher energy demand or higher cold start requirements We recommend testing it right away.
  • (6) Installing a new battery

    • Before installing the new battery, clean the mounting space in the vehicle.
    • Only install a battery with an off-load voltage of >12.5 V.
    • Secure the new battery firmly in place.
    • Clean the battery terminals and terminal clamps and then apply some Banner terminal grease or terminal protection spray to the terminals.
    • For installation, proceed in reverse order, i.e. first connect the positive terminal (+) and then the negative terminal (-). Ensure that the terminal clamps are firmly attached.
    • Original attachments/sheathings must be refitted.


    Banner tip: For safety reasons, when installing the battery, always use a degassing tube.This will discharge the gases to the outside (does not apply to Bike Bull AGM, GEL and AGM PRO batteries). The degassing tube must not be kinked during installation. 

    Caution: Never install a maintenance-free battery (Bike Bull AGM, GEL, AGM PRO) in a motorcycle without a regulator. Do not exceed the max. charging voltage of 14.8 V.

  • (7) Test start


    • Now, start the engine to ensure that the new battery has been installed and connected correctly.
    • “VROOOM” – is usually a good sign. Now switch on the radio. Perfect. The radio code is present and full sound is guaranteed for your next trip.
Bild 1 von 7
Accucharger 3A

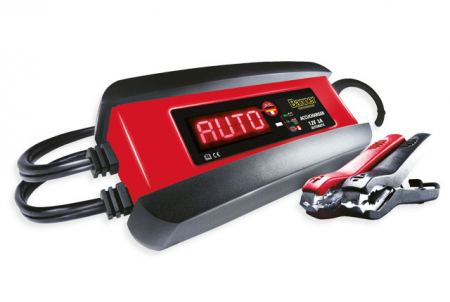
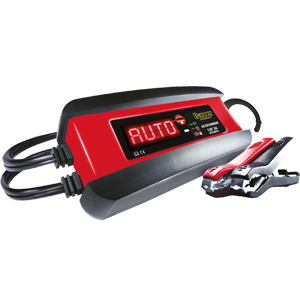
Charging motorcycle batteries – how to do it properly with the Banner Accucharger.

Ideally, you should use voltage-regulated chargers from the Banner Accucharger series. These charging devices are fully automatic. Depending on the battery capacity, you can use the following chargers:   


  • Batteries <9 Ah - Banner Accucharger 6/12V 2A
  • Batteries 9 - 20 Ah – Banner Accucharger 12V 3A 
  • Batteries > 20 Ah – Banner Accucharger 12V 6A Recovery


Good to know: When maintaining the charge with a Banner Accucharger, the battery is periodically recharged with a small current after it has been fully charged, just to compensate for the battery's self-discharge! This is precisely why there is absolutely nothing to be said against a longer period of trickle charging when using a Banner Accucharger. Simply ideal for longer periods when the vehicle is not in use or for winter storage.

Please accept the marketing cookies to see the content